Last summer I survived on cold "fruit"...fruit popsicles and grapes. Lots and lots of grapes. This summer, I've decided to try to broaden my scope and use up some old-ish riper-than-I-like-to-eat-on-their-own bananas. Basically, whenever I buy bananas and inevitably fail to eat all of them before they start to turn spotty, I peel them whole, stick them in a ziploc, and plop them in the freezer. Usually I'm thinking all be fancy and bake delicious banana bread, which I am very good at not doing. So, even though they are quite tasty on their own (sliced), today, I decided to whiz up some frozen bananas into an insanely easy and quick smoothie.
"Yeah, you know I'm smoooooth" Banana Smoothie
Serves 1 (about 8 oz)
1 frozen banana cut into about 1.5 inch pieces
1/4 to 1/2 cup milk (soy milk would be great in this as well)
A few ice cubes (probably 3-4)
Take your trusty blender out and put in banana pieces. I would suggest whizzing a bit and then adding in the milk and ice in parts as you blend so you can control the consistency and amount. The ice mostly just helps to keep the smoothie colder and keep a thicker consistency (unless you really just want cold banana milk).
That's it! Seriously. It was sweet enough without simple syrup or sugar; I actually added more ice to cut the sweetness. Also, I thought I might not have enough time to whip this up this morning before leaving for school, but was done in about 3.5 minutes (sans cleanup).
Wednesday, May 30, 2012
Thursday, May 24, 2012
Grown-up Breakfast in the Nighttime
UPDATE: Wow. Do not try to blog while doing other things. I wrote this recipe with roasted potatoes in mind (which is what the cayenne, rosemary, thyme, and/or paprika were for), but never mention them. So, banished from the blog are those ingredients. More importantly, we would never roast anything at 315 F! Well, I wouldn't. That should be 415 F. Fixed and done.
Since being reminded during Klug's visit that eggs are a thing that taste good, I have been eating them as frequently as justifiable. Here are my recent favorite things to eat with eggs:
Fried Eggs with Roasted Asparagus and Dijon Mustard
Serves 1
2 eggs half a bunch of asparagus*
1-2 slices of quality bread**
olive oil
cayenne, rosemary, thyme, and/or paprika***
Kosher salt, pepper
Dijon Mustard****
Cholula (optional)
Okay, so, this isn't really a recipe, because, duh, making all of these things is trivial. But, here's how anyways:
Preheat oven to315 415 F.
Trim and wash asparagus. If you just bend the asparagus stalk, it will break at the end of the woody fibrous end, which you should trash. Lay out asparagus on a cookie sheet (covered with foil first, if you want easy cleaning). Drizzle a little olive oil over the stalks and sprinkle a pinch of kosher salt. Mix so all stalks are covered with some olive oil and salt. Roast on the top-ish rack in the oven for 10-14 minutes, depending on your oven and how crispy you like the asparagus. Make sure to check the asparagus at about 10 minutes to avoid over-roasting.
Note: I have spent many a time trying to perfect the roasting temp and time for asparagus, and have found that315 415 F for 14 minutes is perfection. You can be perfect like me and follow suit, or you can be imperfect and obstinate and figure it out for yourself. Just kidding, I'm all for the discovery process.
While the asparagus are roasting, take your slice(s) of bread and toast in toaster oven. If using a toaster, wait a few minutes.
When only a few minutes remain for the asparagus and toast, heat a little bit of olive oil (I never measure, but maybe a teaspoon?) in a frying pan over medium-low to medium heat. Swirl oil around the pan to coat the bottom surface. Crack eggs into the frying pan. Let fry for a short while - until the whites start to set. Salt and pepper the top of the eggs. Flip when you think you can without breaking the yolk. Let fry for about 30-60 seconds. The cook time can vary wildly depending on how well down you like your eggs. At this point, I also like to top the eggs with a little Cholula, because everything is better with hot sauce.
Place an egg on each slice of toast. Add asparagus (I like mine on the side, rather than on top). Then use your knife to add Dijon mustard and/or egg yolk to each bite of egg and/or asparagus like a British person and be pumped!
*Or more. Asparagus is a bit pricey, so it's up to you. Really, any veggie would do, but I've had a hard time finding a nice green veggie that is as good as asparagus with the eggs.
**I would recommend a crusty sort of bread, rather than a sandwich bread, from a local bakery. Whole wheat, sourdough, what have you. If your local bakery has it, I would recommend a dark whole wheat sourdough, which is like manna from the sky (the one I love is from a baker in DC...which apparently no longer exists? Nevermind.)
***Any is good, but probably not all three. Klug prefers the Rosemary, I prefer the paprika, both of us like a little cayenne.
****I am digging the mild and creamy Grey Poupon, because I roll high class like that (oh, it's by Kraft. Sad face.) You could also make your own, but I don't know how to do that. If you're feeling more diner than dining room, mix a little Sriracha or Cholula in with some ketchup.
Since being reminded during Klug's visit that eggs are a thing that taste good, I have been eating them as frequently as justifiable. Here are my recent favorite things to eat with eggs:
Fried Eggs with Roasted Asparagus and Dijon Mustard
Serves 1
 |
| Yep. I stole this picture from the internet because I am still too lazy to take real pictures of my own food. |
2 eggs half a bunch of asparagus*
1-2 slices of quality bread**
olive oil
Kosher salt, pepper
Dijon Mustard****
Cholula (optional)
Okay, so, this isn't really a recipe, because, duh, making all of these things is trivial. But, here's how anyways:
Preheat oven to
Trim and wash asparagus. If you just bend the asparagus stalk, it will break at the end of the woody fibrous end, which you should trash. Lay out asparagus on a cookie sheet (covered with foil first, if you want easy cleaning). Drizzle a little olive oil over the stalks and sprinkle a pinch of kosher salt. Mix so all stalks are covered with some olive oil and salt. Roast on the top-ish rack in the oven for 10-14 minutes, depending on your oven and how crispy you like the asparagus. Make sure to check the asparagus at about 10 minutes to avoid over-roasting.
Note: I have spent many a time trying to perfect the roasting temp and time for asparagus, and have found that
While the asparagus are roasting, take your slice(s) of bread and toast in toaster oven. If using a toaster, wait a few minutes.
When only a few minutes remain for the asparagus and toast, heat a little bit of olive oil (I never measure, but maybe a teaspoon?) in a frying pan over medium-low to medium heat. Swirl oil around the pan to coat the bottom surface. Crack eggs into the frying pan. Let fry for a short while - until the whites start to set. Salt and pepper the top of the eggs. Flip when you think you can without breaking the yolk. Let fry for about 30-60 seconds. The cook time can vary wildly depending on how well down you like your eggs. At this point, I also like to top the eggs with a little Cholula, because everything is better with hot sauce.
Place an egg on each slice of toast. Add asparagus (I like mine on the side, rather than on top). Then use your knife to add Dijon mustard and/or egg yolk to each bite of egg and/or asparagus like a British person and be pumped!
*Or more. Asparagus is a bit pricey, so it's up to you. Really, any veggie would do, but I've had a hard time finding a nice green veggie that is as good as asparagus with the eggs.
**I would recommend a crusty sort of bread, rather than a sandwich bread, from a local bakery. Whole wheat, sourdough, what have you. If your local bakery has it, I would recommend a dark whole wheat sourdough, which is like manna from the sky (the one I love is from a baker in DC...which apparently no longer exists? Nevermind.)
****I am digging the mild and creamy Grey Poupon, because I roll high class like that (oh, it's by Kraft. Sad face.) You could also make your own, but I don't know how to do that. If you're feeling more diner than dining room, mix a little Sriracha or Cholula in with some ketchup.
Wednesday, May 23, 2012
Eat Polenta, Be Happy
So, I've decided to try to revitalize this blog this summer (was it ever really alive, though?), so here goes. (Also, Helvetica is a font type now. Good job, blogger, you win.)
Let's start this post with an interactive question: Did you know that polenta is GREAT?
Oh. You did? Okay, sure. Because you are better than everyone, good for you. Well, I did not because...I'm a lifetime learner. Whatever. Here is the recipe for my inaugural polenta experience (again, sorry for no pictures):
Polenta with Caramelized Onions and Mushroom Sauce
Polenta can be purchased dry and quick-cooked on the stovetop, or, if you're lucky, you'll find the weird tube of already cooked polenta to slice and use as you wish (thanks to Katie Klug for telling my lazy self about this, and to Marsh for being the only store in Bloomington that carries it). If using pre-cooked polenta, you can bake in oven at 315 F for about 15 minutes or heat on the stove top (or, heat it in the microwave, but really, don't).
Makes about 3-4 servings.
(Since I'm single, I made the mushroom sauce at Time 1, and then, per serving, sauteed 1/2 onion + 1 garlic clove + 1/3-1/4 of the polenta to order.)
Polenta
1 1/2 onion
3-5 cloves of garlic*
10-16 oz of mushrooms**
About 1 cup milk and/or stock***
1-2 tablespoons flour or corn starch****
A few tablespoons olive oil
Thyme, salt, peper to taste
If baking polenta, preheat oven to 315 F before starting.
For the Sauce:
Cut mushrooms into pieces. I like my mushroom pieces sort of small, so I halve and slice them, but you can make them as big or small as you like. Heat about a tablespoon of olive oil in a pot on medium. While the oil heats, mince 1-2 cloves of garlic. Add garlic to heated oil for about 15 seconds; then add mushrooms. Let mushrooms cook until wilted; about 10 minutes. Add flour or corn starch and stir until smooth. Start adding milk or stock in parts and bring sauce to a simmer, continuing to add liquid until you have the desired amount and consistency - you may end up using less than 1 cup or more than 1 cup. Add thyme, salt, and pepper to taste. Let simmer for a little longer and then take off heat.
For Everything Else:
If baking polenta, slice, rub a little olive oil, salt, and pepper on the slices and bake in a baking dish or cookie sheet for about 15 minutes. If cooking on stove top, just slice and let chill out on the countertop while you: Julienne onion and mince 2-3 cloves of garlic. Heat about a tablespoon of olive oil in a frying pan on medium to medium-low heat. Add in garlic and onion. Let sauté and then reduce heat to medium-low to low and leave onions be. This will help them caramelize. If starting to get brown, push onions around (yeah, go ahead, you pusher) and possibly reduce heat. Add in polenta slices and cook until warm.
DONE. Sort of. Place polenta slices on plate. Or, if you want less geometric polenta, mush polenta. Top with caramelized onions, and then top that with mushroom sauce.
If you're feeling audacious, or just hungry, add in a nice green veggie. Tonight I cut up some zucchini and added it into the onion/garlic mixture before adding in polenta (being a vegetarian means I will take extra vegetables wherever I can get them). You could also be more ambitious and actually toss a green salad or something. That would be nice.
*I use about 2 cloves of garlic for the sauce and 1 clove of garlic (and 1/2 an onion) for every serving, but I've been told I'm a crazy garlic fiend, so...
**I used crimini because they're relatively cheap but flavorful. Wild mushrooms would be great in this though.
***I like to do half milk and half stock. You could also use cream, but I'm cheap.
****Oddly, I only had corn starch on hand, which results in what I think of as a sort of shellacked finish to the sauce and a slightly more gelatinous texture (it's really not that bad even though I made it sound horrid).
Sunday, November 27, 2011
A Cornucopia of...Food. And Stuff.
I've been going back and forth with cooking since returning home from Boston, but have a few morsels to share that have recently been dominating my diet (sorry for the lack of pictures, but I've been less than motivated to document my daily goings-on, much to, I'm sure, many's dismay). My motto is, if you can't eat at Clover everyday, try this shit out:
1. "When I Was Your Age I Walked 14 Miles in the Cold to Suture My Own Finger that I Ripped Open While Sewing Clothes From Burlap for My 12 Brothers and Sisters" Granola
Because, you know, it's homemade.
Anyhow, after visiting Kim in Boston (always inspiration for new foods and techniques to try out), one of my favorite things I came away with is a new granola recipe, courtesy her friend's blog, www.simmerboston.com. The best things about this granola recipe is that it is super easy, has no butter or oil (thus a lot less fattening than most granola), and can be modified according to your own tastes.
I have been halving the recipe, using honey instead of maple syrup (cheaper and more readily available here in IN), and using sliced almonds and pumpkin seeds as my nuts of choice.
The one thing I would say is to play around with the oven temp and bake time, neither of which are stated in the recipe. When I was eating goat cheese and bread while Kim slaved away baking the granola (and our dinner, fish with a dijon mustard sauce, roasted brussels sprouts, and brown rice; see below), we discovered that, I think, 20 minutes was too long. My first go also proved too much, as my granola was a bit...crispy. I did 15-20 minutes at about 300, I think. My most recent attempt was more successful, but I was on the phone, so I have no idea how long I left it in there. If anyone comes up with a good combo of temp and bake time, let us know!
The recipe is here: http://simmerboston.com/2010/04/homemade-granola/
2. Broiled Bluefish Dijionnaise
On our way home one evening, we made a spontaneous stop at The Raven used bookstore (on Newbury Street, no less!), and Kim coerced me to use my camera for questionable means that resulted in one of my new favorite (albeit, ridiculously simple) fish recipes. Because I can't cite it (we didn't think to take a reference shot of the title page, obviously), I'll give the minimum.
Broiled Bluefish Dijionnaise (substitute other fish as you see fit, likely white, meaty fish)
1/4 cup mayo
2 tablespoons Dijon mustard
1/4 teaspoon thyme or oregano (optional)
4 (6-ounce) pieces of Bluefish fillet (skin on or off)
Coarse salt and freshly ground white pepper
Set cast-iron skillet on broiler and heat for 15 minutes. Want the griddle sizzling hot.
Stir mayo and mustard together in small bowl. Crumble in herbs if using.
Season fish with salt and pepper on both sides and paint one side with mustard coating.
Put fish on griddle, painted side up, and broil 3 to 4 minutes, until coating is brown and bubbling. Serve hot.
It says you can also use a Foreman grill, which is hilariously awesome to me, but it says to leave the skin off if doing so. I don't have a cast-iron skillet, so I just use a regular baking dish, which works fine. However, I can attest to the cast-iron skillet producing tastier results.
Kim served this with a side of brown rice and roasted brussels sprouts, which brings me to:
3. Roasted Everything or My New Obsession or How to Eat When You're A Lazy Ass Cook
This requires very few words, other than to say, roasting vegetables really does make them taste better. I avoided this method for years because it seemed like it took So. Damn. Long. But, that is untrue!
Preheat your oven to 350-450 degrees (depending on how audacious you're feeling that night), toss whatever you're roasting in olive oil, salt, and pepper, and pop it in the oven for about 15-25 minutes, depending on what you're roasting. I also like to add sliced onion and roughly chopped garlic to whatever I'm roasting to add extra flavor and round out the meal.
Some favorite roasting options:
- butternut squash (the ultimate delicious roasting item...great on pizzas, orzo, pasta, or by itself...possibly mixed with goat cheese...)
- asparagus (shorter roast time for these little babies)
- brussels sprouts (which sound heinous, but are not. Best if you cut them into smaller pieces to ensure they are tender and thus less bitter. Also, good when you add balsamic vinegar into the tossing mixture)
- fingerling potatoes (I like to add paprika or smoked paprika in addition to salt and pepper. Also good, rosemary.)
- Cauliflower
4. Finally, an experiment in progress: Popovers
I recently made these over break, but they didn't turn out as I hoped. They were sufficiently popover looking (though slightly more brown than I would have hoped because I left them in the oven for too long), but tasted a bit like scrambled eggs...which I think was because I forgot to let the melted butter cool before mixing everything else together, but maybe is just the way popovers taste? I'll be attempting these again, but need more eggs to do it.
4 large eggs
3 tablespoons unsalted butter, melted, plus more for the pan
1 1/2 cups all-purpose flour, spooned and leveled
1 1/2 cups whole milk
1/2 teaspoon kosher salt
Heat oven to 400 degrees. Brush cups of 12-cup nonstick muffin tin with butter.
In large bowl, whisk together the flour, milk, eggs, butter, and salt until only a few lumps remain (do not overmix).
Divide batter among prepared muffin cups and bake until puffed and a deep golden brown, 30 to 35 minute. (Do not open oven door before 30 minutes or the popovers will collapse. Remove 1 popover to check that the underside is browned.) Serve immediately.
Monday, August 8, 2011
Brits vs. Americans...
While attempting to synthesize and log notes on intergroup and group processes, I had Julie and Julia on in the background (marking the umpteenth time I've watched this movie), which, of course, made me wish I was cooking (or blogging) rather than studying. This, then, made me absolutely determined to do some real cooking this fall. For whatever reason, maybe because I just learned that Yorkshire pudding isn't pudding at all but rather very much an American popover, I have decided to tackle the former first. And a souffle. (Mmm. Souffle.)
Have I attempted one yet? No. Why am I mentioning it here? Because it's (fairly) well-established that committing oneself publicly in writing increases the likelihood that the behavior will occur. So, to the 1.5 people that maybe still possibly read this blog, there you have it. You have roughly 4 weeks to prepare yourself for this foodie shit to get crazy. Yo.
*I just noticed the difference between Yorkshire pudding and a popover is a matter of national origin, but so too are the psychological domains flippantly mentioned at the beginning of this post. This was completely unintentional, but still awesome.
Sunday, April 24, 2011
That's what happens when you try to post at midnight.
Fellow food lovers: I'm sorry I barraged you with family photos. I meant to post those to our family/personal blog, but alas, I woke to find I had shared them with you all instead! I do hope you have a Happy Easter, and eat something delicious. If you haven't discovered the food blog Smitten Kitchen yet, I commend it to you -- make some of her strawberry rhubarb compote to celebrate spring!


Monday, February 21, 2011
TVP? We'll see.
I've been doing a lot of this lately:

Why?
All you need is love, right? And, nothing says LOVE like TVP and black bean (with peppers and onions) nachos in a heart-shaped pan! Saute it all together with some TJ's taco seasoning and olive oil (TVP has no fat, unsurprisingly), top with Tilamook Cheddar and put into the oven at 450F for 5-10 minutes - voila! Dinner!
Pairs nicely with a gin and tonic (Bendistillery gin, of course).
Now, if I could only figure out how to abate TVP gas, we'd be in business...
Tuesday, January 18, 2011
Experiments in Polenta-Land
Happy New Year, all!
My year as a high school teacher continues to nudge me away from the kitchen and towards frozen delights from TJs or snack-dinner (a term coined by Katie VL's little nephews when I was down visiting over the holiday).
However, every once in a while, I get inspired. A few weeks ago, two dear friends had me over for dinner and we feasted on amazing beet and avocado salad and baked polenta with goat cheese. I vaguely remember hearing about polenta once before in my life, but I had no idea that it is an Italian grain made of cornmeal (are you thinking what I'm thinking? Gluten-free!). You can buy it at TJs in a little polenta-log, make it yourself, or buy it elsewhere, I'm sure. It's affordable and organic at TJs, so win-win. Tonight, when I came home after an 11 hour day with almost no sustenance and a shot voice, I was looking for something to make with polenta that gave me protein, veggies and a new taste. What I came up with was completely an accident, but I loved it and will make it again soon.
_______________________________________
Pesto Polenta with Shrimp and Pan-Fried Veggies (gluten-free)
Place polenta slices (1/4-1/2") onto a cookie sheet and into an oven at 350F, topped with parmesean cheese. Bake for 20 min.
While baking, pan-fry 1/4 red pepper and 1/2 zucchini (sliced) and a large handful of spinach in an ample amount of olive oil. Add shrimp (or any meat you desire, I suppose) and continue to fry. Now, for the magic: season towards the end with black pepper, a spoonful of pesto, a hefty sprinkling of parmesean cheese and a few tangy sun-dried tomatoes. Mix around and coat with pesto while finishing your pan-frying.
Take polenta slices out of oven and place on a plate. Top with the veggie/shrimp/oil mixture which will be absorbed by the polenta, enhancing the flavor of everything. The polenta should be slightly crispy on the outside, which is delicious.
________________________________________________
Serve with wine to drink and Seu Jorge's album, Cru, as accompaniment for your elegant meal. I will be finishing my evening with my favorite Italian chocolate: bittersweet Perugina.
Salute!
Monday, December 6, 2010
Unexpected Christmas Cookie!
This weekend, I tried out a vegan chocolate sauce as a crepe-topper with mild success. Then, tonight, craving something pepperminty, I tried to figure out how to make my first gluten-free christmas cookie of the season. What followed was more successful than I anticipated (and easy and fast!):
No-Bake Chocolate Peppermint Macaroons (V, GF)
1/4 cup (or more) sweetened flaked coconut
1/4 cup oats
1/4 cup coconut oil
2T dark chocolate cocoa powder
Agave nectar to taste (I think I used 1-2 T)
Peppermint extract to taste
In a bowl, mix sweetened, flaked coconut and oats. Press into a small plate lined with wax paper (I made a little envelope of wax paper...just wing it).
Heat coconut oil in a small bowl for about 1.5 minutes (until melted), then slowly stir in cocoa (mix well - the cocoa can clump up easily). When mixed, add peppermint and agave until you reach the desired sweetness and flavor. Then, pour chocolate sauce on top of your coconut/oat mixture and use the wax paper to distribute the sauce through. Wrap up and place in refrigerator for 10 minutes or more to harden the coconut oil. Remove, unwrap and cut up into pieces. Makes one piece of "macaroon bark" about 5" square.
My carnivorous father LOVED them, so I hope you will too.
Thursday, November 25, 2010
Gluten Free Mini Pumpkin Cheesecakes
I have been long absent from this blog, both because I've started a new, tiring job and also because I have been delving into the world of gluten-free living, which has seen me spending many of my evenings with nachos in hand.
However, for Thanksgiving, I wanted to make something I could eat with my favorite ingredient (pumpkin!), so I experimented today since it was a snow-day in Seattle. (Certainly NOT as exciting as my from-scratch pumpkin pie experiment from last year, but whatever). These little guys are great for gfers and non-gfers alike.
Gluten Free Mini Pumpkin Cheesecakes
Before prepping: preheat oven to 350F. Make sure cream cheese has been softened (leave out on counter for 4+ hours before baking) before getting started.
Load a muffin tin with wrappers and place one mini gluten free ginger cookie (Mi-Del brand from Fred Meyer is delicious!) or vanilla wafer flat side down in the wrapper.
Filling:
- 1.5 (8-ounce) packages cream cheese, at room temperature
- 1 cup pureed pumpkin
- 2 eggs
- 1/8 cup sour cream (1 big spoonful)
- 3/4 cup sugar (1/2 white, 1/2 brown)
- 1/2 teaspoon ground cinnamon
- 1/8 teaspoon fresh ground nutmeg
- 1/8 teaspoon ground cloves
- 1 teaspoon vanilla extract
First whip cream cheese until fluffy and smooth and then add rest of ingredients and beat for another few minutes. If not yet smooth and fluffy, transfer to a blender and blend out the lumps (works very well, actually). Pour batter into muffin tins (almost full – it won’t rise). Bake for 25-27 minutes at 350F.
Topping (optional):
- 1 cup sour cream
- 1/4 cup white sugar
- Splash of vanilla
Beat ingredients together (I used a wire whisk on my kitchenaid and it worked nicely). If desired, pull out cupcakes 5 min early, spread on a thin layer of topping and put back in oven for the remaining 5 minutes. Cool, then let set up in fridge overnight. I sprinkled a light dusting of cinnamon on the top of each mini-cheesecake as they were cooling.
Makes 14 large mini-cheesecakes. Enjoy!
Monday, June 21, 2010
slow-cooking
This is my premier post on the "eat this" blog. Please don't judge too harshly - but i took a picture, so i thought that might offer me a few bonus points?
So, I just cooked a whole chicken for the first time last night/today (ok, in June - it took me awhile to upload the picture). I just moved into a house where I'm a live-in companion with a couple of adults with developmental disabilities - which is neither here nor there, except that upon moving into a new house / taking charge of a household, I inherited a number of food items (and other things) I might not have chosen to purchase myself (like many packs of bologna and hot dogs, cans of beefaroni, a box of 36 hamburger patties, etc.). This is a bit of a curse and a blessing - while at first I was a bit confounded at how I would manage to get all of this food out of the house without throwing it directly in the garbage, I have since welcomed the creative challenge.
One of the items was also a whole chicken - something I've never tried to cook before because it kind of grossed me out, and because I've never felt like I've had an occasion to do so, but something I nevertheless "believe" in - cooking and eating the whole chicken, versus purchasing a whole pack o' breasts (which I actually just did, in case the whole chicken thing didn't work out). And after my friend Jennifer crock-pot cooked a whole chicken when I was with her in England last summer, I was inspired by her and her husband's Chris commitment to slow and local food (of course this inherited chicken was not local - clearly grocery store brand).
So, I decided to go to trusty allrecipes.com to see if there were any pointers or recipes about how to go about this task. And lo and behold, one of the recipes for "whole chicken crock pot" was Chicken Spaghetti, which I was also planning to make soon.
In that recipe, it simply said to place the chicken in a slow-cooker, cover with water, and add some salt and pepper. Could it be that simple??
Yes - well, close.
First, I had to take off the plastic of course. Then, my grocery store chicken had a plastic bag o' innards stuffed inside, which I took out, and simply threw in the trash can. Mind you, I'm still new at this - I wasn't quite ready to deal with the mysterious bloody mess in that plastic bag. I'm guessing it was livers and gizzards, but I'm not sure.
Then, I simply placed the chicken in my crock pot, covered most of it with water, added some salt and pepper (and a dash of cumin and basil or something, just because I figured salt and pepper couldn't suffice for seasoning), and set it on High.
I cooked it on High for a good hour or more, turned it over (since I hadn't covered it completely with water) then went to bed with it set on Low.
In the morning, it was already tender, but some of the meat looked a little pink, so I turned it on High for 30 more minutes or so, and was gone again for the morning, so I turned it back down to Low (you can tell I have a very high-tech crock pot). By Noon, the house smelled of chicken and when I put a fork in it, meat practically melted off the bone.
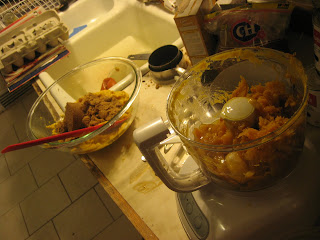
So, I drained off a small container of broth, let the rest go down the sink, and went to work pulling all that good meat off the bones. I used a fork mainly, with the occasional help of a butter knife - it was that tender. I put the meat in a casserole dish I later used for Chicken Spaghetti. There were a few liver-y looking parts that were kind of gross to touch, and I had to watch out for a few smaller rib-like bones, but other than that, it was pretty easy to get it all apart. 15-20 minutes, later, I had this:

As follow-up to the crock-pot chicken adventure, you'll be interested to know that the other 1/2 of the pulled chicken that I put away in the fridge was eaten overnight by one of my housemates/clients. He loves a midnight snack - sometimes to the detriment of future meals I have planned for the rest of us.
Since said chicken adventure, I have crock-potted the pot roast that I also inherited - pretty good results as well. I've crock-potted beans at least once I think too, and I've decided that'll be the only way I'll do dry beans in the future, because I can't seem to get them to cook in a regular pot for the number of hours it says on the bag.
Happy slow-cooking!
So, I just cooked a whole chicken for the first time last night/today (ok, in June - it took me awhile to upload the picture). I just moved into a house where I'm a live-in companion with a couple of adults with developmental disabilities - which is neither here nor there, except that upon moving into a new house / taking charge of a household, I inherited a number of food items (and other things) I might not have chosen to purchase myself (like many packs of bologna and hot dogs, cans of beefaroni, a box of 36 hamburger patties, etc.). This is a bit of a curse and a blessing - while at first I was a bit confounded at how I would manage to get all of this food out of the house without throwing it directly in the garbage, I have since welcomed the creative challenge.
One of the items was also a whole chicken - something I've never tried to cook before because it kind of grossed me out, and because I've never felt like I've had an occasion to do so, but something I nevertheless "believe" in - cooking and eating the whole chicken, versus purchasing a whole pack o' breasts (which I actually just did, in case the whole chicken thing didn't work out). And after my friend Jennifer crock-pot cooked a whole chicken when I was with her in England last summer, I was inspired by her and her husband's Chris commitment to slow and local food (of course this inherited chicken was not local - clearly grocery store brand).
So, I decided to go to trusty allrecipes.com to see if there were any pointers or recipes about how to go about this task. And lo and behold, one of the recipes for "whole chicken crock pot" was Chicken Spaghetti, which I was also planning to make soon.
In that recipe, it simply said to place the chicken in a slow-cooker, cover with water, and add some salt and pepper. Could it be that simple??
Yes - well, close.
First, I had to take off the plastic of course. Then, my grocery store chicken had a plastic bag o' innards stuffed inside, which I took out, and simply threw in the trash can. Mind you, I'm still new at this - I wasn't quite ready to deal with the mysterious bloody mess in that plastic bag. I'm guessing it was livers and gizzards, but I'm not sure.
Then, I simply placed the chicken in my crock pot, covered most of it with water, added some salt and pepper (and a dash of cumin and basil or something, just because I figured salt and pepper couldn't suffice for seasoning), and set it on High.
I cooked it on High for a good hour or more, turned it over (since I hadn't covered it completely with water) then went to bed with it set on Low.
In the morning, it was already tender, but some of the meat looked a little pink, so I turned it on High for 30 more minutes or so, and was gone again for the morning, so I turned it back down to Low (you can tell I have a very high-tech crock pot). By Noon, the house smelled of chicken and when I put a fork in it, meat practically melted off the bone.
So, I drained off a small container of broth, let the rest go down the sink, and went to work pulling all that good meat off the bones. I used a fork mainly, with the occasional help of a butter knife - it was that tender. I put the meat in a casserole dish I later used for Chicken Spaghetti. There were a few liver-y looking parts that were kind of gross to touch, and I had to watch out for a few smaller rib-like bones, but other than that, it was pretty easy to get it all apart. 15-20 minutes, later, I had this:

As follow-up to the crock-pot chicken adventure, you'll be interested to know that the other 1/2 of the pulled chicken that I put away in the fridge was eaten overnight by one of my housemates/clients. He loves a midnight snack - sometimes to the detriment of future meals I have planned for the rest of us.
Since said chicken adventure, I have crock-potted the pot roast that I also inherited - pretty good results as well. I've crock-potted beans at least once I think too, and I've decided that'll be the only way I'll do dry beans in the future, because I can't seem to get them to cook in a regular pot for the number of hours it says on the bag.
Happy slow-cooking!
Sunday, April 4, 2010
when friends come into town...
...cooking no longer seems pointless!
A good friend of mine and Katie's from college came to visit Seattle this weekend and I got the cooking bug!
We started off with cinnamon belgian waffles:
(makes 6 servings)
2 eggs (beat well first untill fluffy, then add rest of ingredients)
2 cups flour
1 3/4 cup milk
1/2 cup veg oil
1-2 T brown sugar
4 tsp baking powder
1/4 t salt
1 tsp vanilla
Then...it was time for the main event: whole wheat oatmeal bread!
1 cup oatmeal
2 cups boiling water
(mix and let sit until lukewarm)
then, stir in the following:
1/2 cup molasses
1/4 cup veg oil
1 T salt
4.5 cup white flour
1 cup whole wheat flour
1 packet of yeast prepared earlier with 1/2 cup of warm water @ 100 F (stir and let get started for 10 minutes)
-knead dough for 10 minutes, adding some flour if needed
-ball up, rub with a little veg oil and cover
-let rise 1-1.5 hours (until double size) in a warm house (~80 F) or an oven that has been pre-warmed (put on low for 5 minutes, then turn off and put dough in)
-punch down and shape into loaves or rolls (make sure to grease pans with crisco)
-let rise again 30-45 minutes and bake (rolls for about 20 minutes at 375, loaves about 20-25 minutes at 325-350)
-enjoy! soooo amazing. I brushed the top of the rolls with olive oil, which was even better.
Then, we topped it off with a little tofu stirfry with garlic, green onion, broccoli, olive and sesame oil, soy sauce...but, you're all better at stirfrys than I am, so I won't post any other details.
Happy Easter!
Thursday, March 25, 2010
Who doesn't love TJs?
I don't know if you ladies are near a Trader Joe's, but I've found as a teacher and a vegetarian (well, pescatarian) that I can subsist off of their whole wheat naan/hummus, whole wheat pizza dough and frozen options for that quick lunch or lazy dinner.
I used to think that TJs could do no wrong: cheaper produce, healthier choices and local options. But, then I tried their frozen soyrizo quiche and I had to take a step back. Then tonight I had another disappointing frozen option, so I thought, I wonder if the ladies at Eat This have tried other frozens I haven't and could save me some disappointment and money?
With that, my favorite frozen foods from TJs:
-Thai shrimp gyoza
-Cheese tamales
-Cheese enchilada
-Paneer tikka (their garlic naan is fantastic, too)
-Soy cream vanilla
And the ones to miss:
-Cheese/soy quiche (it will make you cry)
-Vegan Phad Thai with Tofu
-Curried Lentils (not horrific, but not awesome either)
-Breaded Cod (again, not terrible)
-Soy cream vanilla/mango mix
That's what I've got so far...most of these are probably just preferences, but I stand fully by my quiche statements. Please add to the lists if you care.
Monday, March 22, 2010
Food (Supposedly) From the Homeland: Korean Vegetable Croquettes
Funny, that I seem to only post about Korean food despite never really having eaten much Korean food before the age of 18. Oh well.

In accordance with one of my Spring Break resolutions (cooking real food made of things that don't require an ingredient list on the back of the box), I chose this Korean side dish as my first triumph. Whether or not this is really anything like anything served in Korea is up for debate, but I'm sure the woman from Goshen, IN who contributed this recipe really knows her stuff (probably not).
Korean Vegetable Croquettes
(From Extending the Table)
Mix together:
1 cup potatoes, coarsely grated
3/4 cup carrots, coarsely grated (you can actually use any veggie you want, but carrots are recommended)
1/2 cup onions, chopped
1 clove garlic, minced (or, if you're me, more)
Make batter of:
3/4 cup flour
1 teaspoon salt
1/4 teaspoon pepper
2 eggs, beaten
1/4 cup water
 Stir batter into vegetables.
Heat in skillet 1/2 cup oil.
Drop vegetable mixture into hot oil by teaspoons or tablespoons depending on size desired. Fry until browned on both sides. Drain on paper. Serve hot.
Now, if you're like me (afraid of fire, oil, and geometrically afraid of fire and oil together), you'll likely not use all 1/2 cup of oil at once. However, if you don't, you'll probably end up using it all eventually, as the oil cooks off the pan (and soaks grossly and artery-cloggingly into the croquettes because it's not hot enough and you have to let them sit in the oil for like 3 minutes). Bottom line: go big or go home (but be careful) - heat that sucker up with enough oil that the croquettes can sit in them and fry up quickly. Also, small is good here - they'll cook a lot faster.
I dipped mine in a little Teriyaki sauce (which, unfortunately, was not home made), water, and Sriracha (made by the Asian gods of awesome). I also cooked up some rice and stir fried some asparagus and chard in a little soy, water, sugar, ginger, sesame oil, and garlic (a la Kim circa 2006).
 Then I thoroughly covered everything with more Sriracha (= the best).

In accordance with one of my Spring Break resolutions (cooking real food made of things that don't require an ingredient list on the back of the box), I chose this Korean side dish as my first triumph. Whether or not this is really anything like anything served in Korea is up for debate, but I'm sure the woman from Goshen, IN who contributed this recipe really knows her stuff (probably not).
Korean Vegetable Croquettes
(From Extending the Table)
Mix together:
1 cup potatoes, coarsely grated
3/4 cup carrots, coarsely grated (you can actually use any veggie you want, but carrots are recommended)
1/2 cup onions, chopped
1 clove garlic, minced (or, if you're me, more)
Make batter of:
3/4 cup flour
1 teaspoon salt
1/4 teaspoon pepper
2 eggs, beaten
1/4 cup water
 Stir batter into vegetables.
Heat in skillet 1/2 cup oil.
Drop vegetable mixture into hot oil by teaspoons or tablespoons depending on size desired. Fry until browned on both sides. Drain on paper. Serve hot.
Now, if you're like me (afraid of fire, oil, and geometrically afraid of fire and oil together), you'll likely not use all 1/2 cup of oil at once. However, if you don't, you'll probably end up using it all eventually, as the oil cooks off the pan (and soaks grossly and artery-cloggingly into the croquettes because it's not hot enough
 and you have to let them sit in the oil for like 3 minutes). Bottom line: go big or go home (but be careful) - heat that sucker up with enough oil that the croquettes can sit in them and fry up quickly. Also, small is good here - they'll cook a lot faster.
I dipped mine in a little Teriyaki sauce (which, unfortunately, was not home made), water, and Sriracha (made by the Asian gods of awesome). I also cooked up some rice and stir fried some asparagus and chard in a little soy, water, sugar, ginger, sesame oil, and garlic (a la Kim circa 2006).
 Then I thoroughly covered everything with more Sriracha (= the best).
Tuesday, March 2, 2010
Sociable Soups
This year for lent I decided to invite folks to join me for dinner and a time of reflection every Wednesday from Ash Wednesday till Easter. I've really enjoyed intentionally setting this time aside to share a meal with others. What I haven't told my weekly guests is that they are also my excuse for trying new recipes...
The first week I tried this soup from Didi Emmons' Entertaining for a Veggie Planet (the second chapter of this cookbook is titled "sociable soups" hence the blog title...) :
Butternut and Ginger Soup
1 Tbs oil
2 onions, chopped
1/4 c peeled and minced fresh ginger
3 garlic cloves, minced
1 2lb butternut squash, peeled, seeded and cut into 1-inch cubes
1 13.5 oz can of unsweetened coconut milk
1 tsp of Asian chili sauce, or more to taste
3 Tbs of chopped fresh cilantro
salt and pepper to taste
3 Tbs peanuts, chopped and roasted for garnish
In a large sauce pan, heat the oil over medium heat, Add the onions and saute, stirring occasionally until soft, about 7 minutes. Add the ginger and garlic, saute for 1 minute more.
Add the squash, coconut milk, and 5 cups of water. Bring to a boil then reduce the heat and simmer, stirring occasionally, until the squash is cooked through 20 minutes, Remove from heat.
Using an immersion blender, puree the soup. Add the chili sauce, chopped cilantro, salt and pepper. Garnish with peanuts and cilantro, and serve!
Delicious!
Sunday, January 31, 2010
It's never a bad time for molasses cookies
Apparently I've been on a cooking/baking roll lately. I tried a molasses recipe today to take to a party, and they were a huge hit! I finished off the leftovers on my drive home (whoops). They go down easily :)
Molasses Cookies (my new favorite, I have to say)
Molasses Cookies (my new favorite, I have to say)
- 3/4 cup margarine, softened
- 1 cup white sugar (or 1/2 c brown and 1/2 c white)
- 1 egg
- 1/4 cup molasses
- 2 cups all-purpose flour
- 1 teaspoon baking soda
- 1/2 teaspoon salt
- 2 teaspoons ground cinnamon
- 1 teaspoon ground cloves
- 1teaspoon ground ginger
- 1/2 cup white sugar (for rolling the cookies)
Tuesday, January 26, 2010
Simple and delicious
Hello! Hope you are all enjoying 2010 thus far.
On Sunday I was cooking dinner for a friend and I wanted to make something quick yet tasty (don't we all). I knew I wanted to do something rice and beany, so I just went to allrecipes and saw what I could find. Haitian rice and beans is what transpired, and, I shit you not, best r&b I've ever had! Who knew cloves could make them taste so great?
My version of the above recipe:
3 Garlic cloves, minced
3 Green onions, chopped
Olive Oil
1 can of TJ's kidney beans (20 oz)
3 cups water
1 cup white rice
thyme, parsley, cloves, salt and pepper (I just winged it like I always do, maybe ~1 t of the first 3 and s&p to taste)
2 bay leaves
2 chopped dried mexican peppers
I sauteed the onion and garlic (I would use more garlic next time and add other sauteed veggies into the mix to make it a whole meal - maybe peppers and mushrooms?) in the olive oil, then added the drained beans and cooked that mix for a couple minutes. Then I added the water and rice, stirred and then added all the spices last. Simmer until the water is gone and there you go (take out bay leaves, though they may be difficult to find!).
The whole thing maybe took 30 minutes - so easy and really amazingly great! Enjoy!
Saturday, December 5, 2009
Soup Season!!!
Hey friends.
Its cold and grey in Michigan, but soups are warm and uplifting. I'm posting to direct you to two great website, with two great soups. I just made caulifower soup it was great! I cut the butter in half, and didn't use the half and half, because I thought it was excessive. But the soup still turned out delicous, and healthier!! Hope you all enjoy.
Hearty Potato:
http://pinchmysalt.com/2008/03/19/a-hearty-potato-leek-soup-recipe-for-the-last-days-of-winter/
Cauliflower:
http://thepioneerwoman.com/cooking/2009/01/cauliflower-soup/
Saturday, November 28, 2009
When I say from scratch, I really mean it.
My family does NOT buy pie crusts (we're actually quite snobby about our pies), but I've always made pumpkin pie with canned pumpkin, and it always tastes great.
 That's what some people call "making it from scratch"...I suppose "not from scratch" would be buying it at the store?
The great pumpkin pie experiment of 2009 took place at my brother and sister-in-law's house this week. Leah and I have both always thought it would be fun to attempt pumpkin pie making sans the Libby's can (read: actually from scratch...real scratch!), so we went for it on Wednesday before the family gathered for Thanksgiving on Thursday.

What transpired was both easier and better tasting than I expected. Literally, this is the best pumpkin pie I've ever had. The key is to food process the heck out of the ingredients (either pumpkin + egg for enough liquid or the whole recipe before pouring into the pie shell).
Here's the recipe (adapted from All Recipes, makes one pie)
This is what we did:
- Cut sugar (pie) pumpkin in half and remove seeds. Place cut side down on a cookie sheet lined with lightly oiled aluminum foil. Bake at 325 degrees F for ~45 minutes, or until the flesh is tender when poked with a fork. Cool until just warm. Scrape the pumpkin flesh from the peel. Puree in 2 batches in a food processor (you may need to put the eggs in so that there is enough liquid to process very smoothly - that's what I did) .
- In a large bowl, slightly beat eggs. Add brown sugar, flour, salt, 2 cups of the pumpkin puree, spices, and evaporated milk. Stir well after each addition. Whisk the ingredients until NO chunks are present (the flour clumped up for us, but a whisk did the trick).
- Pour mixture into the pre-baked (see recipe below) pastry shell. Place a strip of aluminum foil around the edge of the crust to prevent over browning (this is key).
- Bake 15 minutes at 450 degrees F, then reduce the oven temperature to 350 degrees F. Bake an additional ~40 minutes, or until a toothpick inserted near the center comes out clean. Remove the strip of foil about 20 minutes before the pie is done so that the edge of the crust will be a light golden brown (if needed - it may brown enough in the pre-bake of the crust). Cool pie, and refrigerate overnight for best flavor.
- Please use REAL whip cream (and add a little vanilla, if you like) to top with...it's so much better!
Pie crust recipe (my grandma's famous, makes two crusts):
2 cup flour
2/3 shortening (vegetable or butter flavor)
1/4 cup cold water
1 tsp salt
1. Cut the shortening, flour and salt together using a pastry blender until mixed.
2. Add the water in tablespoons while mixing (with your fingers or pastry blender) until moistened.
3. Ball the dough up firmly, then carefully roll out on a flat surface. Leah is great at this: she rolls once, then flips the dough, then back again, etc. so that it doesn't stick to the counter and gets enough flour on both sides.
4. Pick up the dough by loosely rolling it over your rolling pin and place in pie pan (glass pie pans are the best)
5. Gather up edges and make pretty (see picture).
6. Pre-bake pie shell in oven at 350 F for about 10 - 15 minutes. This will make sure your pie crust doesn't get soggy when pumpkin is added.

Subscribe to:
Comments (Atom)


